
Ok, so I had this bright green filing cabinet. Actually it's an antique. This filing cabinet has been with me since I was at least in high school when I had the coolest Lifesaver-themed bedroom E.V.E.R.(many, many, many moons ago!). It has gone to college with me, on to my single life, moved into my first house with my hubby and now rests in our 2nd home.
 |
| This is what my bedding used to look like - cool eh?? Notice how the filing cabinet matches nicely? |

I wanted to get a super good coat of primer on it so I added a second coat. The problem is waiting for each coat to dry so being in a productive mode, I folded clothes AND watched the Olympics at the same time - talented, right? Primer dried, time to move on to the paint. When I opened the paint can, I realized I was low on paint and had to run and get more (not on my original plan but a girls gots to do what a girls gots to do)! While I was there, I did discover this bad boy paint brush and bought one for my future painting needs!
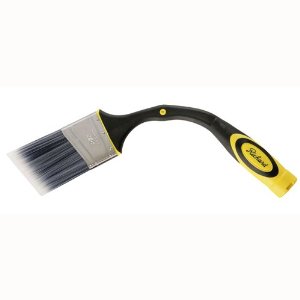 |
| Isn't this cool? It's bendy and also allows you to screw in a handle to the bottom of it for higher paint jobs! I got mine for $18 at my local Dyco. |
Back to subject, and to my first coat of paint. Obviously I left the front non-painted since I was going to cover it with fabric. I am so smart!

Then I pulled out the fabric that I have had for several months and have never used (unfortunately that is typical of me!).
 |
| Love this! |
I was going to paint it like the rest of the cabinet when my oldest daughter suggested painting the drawer fronts chalkboard - brilliant!

Just a few touch-ups and then wait for it to dry. Once done, we slid it back into place, next to my daughter's desk and ta-da!


We are moving the printer to a small table (that doesn't currently exist!) but now is resting comfortable on the shredder I bought a couple of years ago and is still in the box - oh vay!
I think the cabinet looks great and fits the bill perfectly. Time to finish this office with school starting in just over one week, but that is for another post!!
No comments:
Post a Comment