Wednesday, September 26, 2012

DIY Fall Leaf Candle Holders . .

 
Ok, so last year (or maybe it was two years ago), I came across a craft I thought my Girl Scouts would love and it would be easy - these beautiful fall leaf candle holders.  I did this before I really blogged so I don't have step-by-step photos (see, I am not good with the tutorials) but it's super easy.


First, take a lump of clay. I used Amaco Mexican Pottery Self-Hardening Clay. At the time, I couldn't find the clay I wanted in my local stores but my mom found it in her neck-of-the-woods at Hobby Lobby. Thanks Mom. So the girls rolled the clay out to about a half-inch thick. Before the meeting, I printed out outlines of maple leaves on regular paper. The girls cut the leaves out. Then they laid the cut out leaf on top of the flattened clay. They used a plastic knife to cut around the outside edges of the paper leaf and removed any excess clay. Then, before removing the leaf, the girls traced the veins of the paper leaf with a dull pencil so the impression would leave marks on the clay.

See the lines?
It makes it a little more realistic.
When that was all done, we put a candle on it to make sure the main part would be flat and hold a candle nicely. Next, the girls folded up the sides anyway they wanted it. Some girls did not want to use it as a candle holder, they wanted to hang it or just use as decoration, which was perfectly fine. For those who wanted to hang theirs, we put a hole through the top with the pencil (don't forget to sign your name and date it).


Then you let it dry, and dry, and dry. I can't really remember how long it takes to dry because our GS troop meets every week, but I want to say 24-48 hours.


Then comes more fun - painting! The key is to smear the colors together before they dry and make it look natural.

We made sure to paint all the edges but my daughter didn't want to paint the backside of the leaf so that's ok.

Don't they look great?

Another great Girl Scout project! Thanks girls!!

Wednesday, September 19, 2012

Needing Some Fall . . .

Ok, so fall starts this Saturday and while it doesn't fell like fall yet here in Florida, there is a nice cool A/C breeze in my house and the scent and look of fall all around.

To continue the fall tour, I just wanted to share a few more shots with you -


Here's our mantle. The pumpkins are from falls past and I glittered the heck out of them last year (or maybe it was two years ago). Since there is a big, beautiful wreath hanging above (which I have added some embellishments to over the past couple of years) I didn't want to use real candles so I thought I would see how these new flameless candles work. I found this set at Michaels (on sale and with an additional coupon) and I think they add the right color. I don't think the glow is as nice as with real candles but I don't have to worry about them burning down the house!


Here is just a fall leaf garland attached to my beautiful Parisian pediment. I love the way this garland looks and it I ever see more of them in a store, I will buy lots of them to hang everywhere!


This is the sideboard in our dining room. I hung a leaf wreath over the mirror, added some small pumpkins and leaves to the hurricane and put out a few fall photos from our trips.


This is not the best shot of a photo in a frame, but I wanted to share this photo with you. It is one of my ALL-TIME FAVES! I took this in Virginia while we were hiking a trail in the Shenodoah National Park. The girls were holding hands with my husband and I let them get a little ahead of me. They were on a quest to find more chipmunks and I just love that my oldest is wearing her Forest Ranger hat! I also really like all the colors and the way the trees line up. Unfortunately, the original photo is currently on some disk somewhere (or at least I hope it is) so I had to take a picture of the picture!


The floral arrangement in this photo is from Wal-Mart years ago. They had two left and were on a big clearance! Technically, I think they are some kind of orchid but I just love having them out for fall. I think they give off great color.

So that's it for the major rooms. I do have some fall decor in the guest bath, in the craft room and miscellaneous pumpkins stuck here and there, but this is the bulk of it.

I do still want to share some fall vacation photos and a great fall craft my Girl Scouts made a couple of years ago, but that is for another post!

Friday, September 14, 2012

Filling Blank Walls . . .

Ok, so as you can guess by now, I am one of those people who doesn't like a blank, white or beige wall. I like to fill the space with color,  pictures, artwork, you get the idea. In the past, I have even hung a grouping of empty painted frames (I loved them, my brother-in-law, not so much!).

So here are a couple of projects I am beginning to work on and haven't quite completed:

Project One -


Yes, I took these photos at Valentine's Day (sorry so dark). I know, so sad that it has taken me this long to actually make some progress! This is the entrance to our home. I plan to replace the doors (again . . .  someday) with beautiful wood and wrought iron but not on the top 10 things to be done at my house! So for the time being, my goal in the next couple of weeks is to paint the back of the doors black. That seems to be a new trend and definitely adds some drama to the space.


I used to love this tapestry, and to some degree, I still do but I have just gotten sick of it. It has been hanging in this spot for the past 8 years. Time to move on. The problem with our entrance is that it is very small but has very high ceilings.

Rich fell in love with some large, antique-reproduction maps of European cities. He found them on sale in the Frontgate catalog so we are going to hang them on the stairwell leading up to the main floor.


Here's the hall tree I have by the front door. Again, used to love it but getting tired of it and ready to update the space. It's an old door that someone turned into an umbrella stand and added a mirror with some hooks. I love the original green (peeling) paint and the door knob and hinges, but time for a new home. Not sure I will keep it in my house or just get rid of it. I have ben looking for a chunky, Mediterranean-looking chest of drawers to go here. I like to keep the car keys by the front door but don't want to see them. I have found 2 chests I really like but are about 3-6 inches too wide. This space only allows for a 34" wide (at THE most) piece to fit here so very difficult.

The view from the front doors looking up the first set of stairs.
A box of frames I plan on using to fill space on the walls and shelves!
Don't think I need to buy any new ones!!
Project Two -


These are drawings of the girls we commissioned on our first trip to Paris. I love them but this is not the right space for them, too much wall, not enough frame. I plan to use the larger frames I have downstairs to frame architectural photos we have taken of places we have visited. I want to stagger them up the wall and keep adding as we travel (hopefully) more.

So that's the list. I also made MAJOR progress in Olivia's room. Just one more minor sewing project and filling some frames and I will show you the grand reveal but that is for another post!

Thursday, September 13, 2012

Closet Organization . . .

Ok, so a couple of months ago, I just got fed up with my master bedroom closet. Now I am lucky, in our bedroom there are actually 2 closets so I don't have to share with my hubby - bonus!


This is it kind of clean. As you know, I am a girl who likes a place for everything and everything in it's place . . .  at least in my head! I was annoyed with the way everything looked and was all messy. It didn't work for me. So I threw everything out of the closet and started over. I wanted to really organize my handbags and shoes. Using those shelves shown above did not really work. Items kept falling off the sides.


So I found these little gems at The Container Store and thought they would be perfect to hold my handbags. I had used something similar for my shoes a couple of months earlier.


Assembly was easy and only took minutes (which was a bonus).


I moved some pieces around in my closet and decided I liked the handbag organizer on this end. Kindly remember, if you want a blog that will show you how to use cereal boxes and duct tape to make a cute handbag holder, this is not the blog for you!!


Doesn't it look so much better? It also really protects the bags. It's actually 3 units but they come with pieces to stack them on each other. I then used a kit I already had and mounted the top one to the wall so they don't tip over. Clever, right?


I also wanted something to hold my costume jewelry. I always forget what I have and never use it so I decided to buy these little cubbies in Home Goods. I don't really like the fabric and hope to cover it some day . . .  some day way down the road!


I keep gold tone earrings in one, silver in the other, and gold and silver bracelets in a couple more. It does make things much quicker.


So here is the view on one end, miscellaneous items are kept in the brown cubbies. I actually have 2 cubbies open right now where I might put a special pair of shoes or something pretty, still TBD.


Again, for the time being, I just stuck some simple hooks on the wall and used them to hold my longer costume jewelry necklaces. Keeps them from getting tangles and allows me to easily see what I have.


This will work for me for the time being. On our Master To Do List (currently 3 pages long), I plan to redo the closets with dark wood cabinetry and build-in more items but that is down the road, a very, very long road and for a post in the far, far future!

Wednesday, September 12, 2012

Drinking Up Memories . . .

Ok, so a little while ago, I went through all my pulled out stacks of recipes, found them on-line and pinned them on Pinterest. It took a lot of time but I got rid of sooooooo many pieces loose of paper and organized everything in my pretty little boards!

While going through the recipes, I found several that immediately brought back memories of my childhood. One of them is called Russian Tea. My mom used to make large batches of this for me and I remember drinking it on cold nights. I loved the taste and remember it had a bit of a sour/sweet flavor.


So, I had to go to Publix today to buy some things for my youngest daughter's birthday dinner tomorrow night. While there, I picked up all the ingredients I needed to make me some Russian Tea!

When I asked the first Publix employee where I might find some Tang,
he had no clue what it was (yes, he was young).
 I explained to him it was the drink of the astronauts.
Luckily, he found another employee who knew Tang and that
it was located by the powdered drinks (on the bottom shelf!). 


Here's the recipe:

Russian Tea -
Ingredients:

1 c instant powdered tea
2 T powdered lemonade mix
2 c Tang
2 c white sugar
1/2 tsp ground cloves
2 tsp ground cinnamon

1. Mix all ingredients and store in a sealed jar.
2. Mix 3-4 tablespoons of mix with 1 cup of hot water (could also use in cold water)

I did not realize how much sugar it had in it. No wonder it tastes sooo good! I did cut back on the sugar somewhat, but not too much!


Sit back and drink in the memories.

Time to go wrap birthday presents for the birthday girl, but that is for another post.

Saturday, September 8, 2012

Watching POTUS . . .

Ok, so I am one of the least political people I know. I do vote, as I think it is a privilege, and a right. However, many times I have voted against someone instead of voting for someone. This blog post is not to talk about my political views or opinions but about making memories for my girls.

With that being said, we recently had the chance to get tickets to see President Obama speak about 20 minutes from our home. I talked to the girls about it and we decided to go for it. We had to wait in line for about 45 minutes to get the tickets but they handed out free water and had cheerleaders/Obama volunteers along the way so it wasn't bad. The ticket office was in downtown St. Petersburg and there was a Tampa Bay Rays vs. New York Yankees game getting ready to start so there were a lot of people milling about and the town seemed charged!

We even managed to get one for my hubby!
Our original plan was to get up super early since the speech was in a park on a college campus. That means, no assigned spaces or seats and we didn't know how crowded it would be. Then, we had a late night high school football game last night and decided we would get a later start and just listen to him. Goodness knows the Maselli family sure need their beauty sleep!

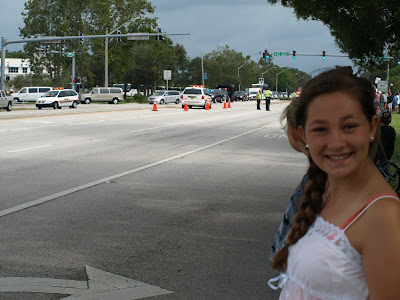
We managed to get out the door of our house by 9:00 a.m. (gates opened at 8:30 - oops!). After reading the newspapers this morning, we decided to park at a local mall and take the shuttle buses. I had read because of the President's arrival, many streets nearby would be blocked off and we wouldn't be able to park there. It took a little time to get on a bus but they drove us right there to the campus so it was worth it. The part that made our jaw drop was the LINE to get into the park. It was as long as all the Disney lines I have waited in - combined! We walked halfway back to the mall to get to the end of the line! We figured we would be there too long and not make it through the airport-like security (minus the taking off your shoes) to see the President speak. Man, this didn't work out. I heard a man behind me talking on his phone. The President had left the hotel and was on his way. You could see the police running around and the crowd was buzzing!! A very kind policeman allowed me to cross the street with my girls so we could watch the Presidential motorcade (Note: My hubby waited in line watching ESPN Gameday on his new, fancy phone, so he was happy). 

Then the next thing you know, motorcycle police start coming by the dozens.


Watching the motorcade and the estimated 30 or so vehicles!
So the girls were excited to see the President arrive (although we had NO clue as to what vehicle he was in). We were able to scoot back across the street and get back in line. That's when the line started moving - fast. We hauled booty and managed to breeze through security and walk right in. That was amazing since no one around us thought we would get in on time. We managed to find a nice little spot and settled in. Charlie Crist (former Republican governor of Florida and graduate of my daughter's high school) gave the opening introduction and then before we knew it, President Obama came on the stage.

I think POTUS is looking at me!

I was irritated the man in front of me was clapping in my shot but I
actually think it looks kind of cool! 

The President spoke for about 30 minutes. It was super hot, super crowded, but I truly think it will be a once in a lifetime memory because my husband and I agree, we won't do this again! I won't have the patience when I am older! Glad I was able to do this for my girls and I hope they remember it so they can one day tell their grandchildren about when they went to see the President speak.

Looking forward to the rest of this month, but that is for another post!